

Baño Ruiz E.(1); Abarca Olivas J.(1); Méndez Román P.(1); Portugués Vegara MJ. (1); Verdú Martinez I.(1); Moreno Ruiz P.(1); Lloret García J.(1,2)
Laboratory assistant: Sanchez de la Blanca Mesas A.(2)
(1)Department of Neurosurgery, Hospital General Universitario Alicante.
(2)Laboratory of Neuroanatomy, Universidad Miguel Hernández de Alicante. Alicante, Spain.
Step 0: Preoperative advices
Step 0: Position (2d)
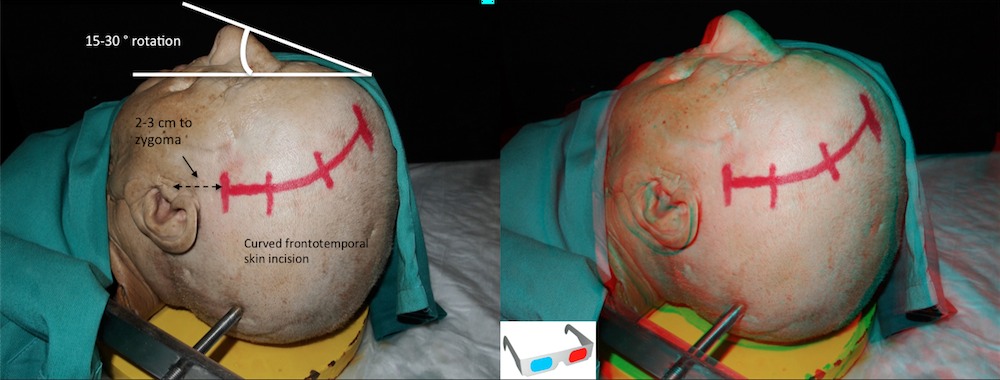
The patient is positioned supine with the head and the shoulders above the heart level (15 to 20º). The head is turned contralateral to de lesion 15 to 30º and minimal flexion, fixed with a 3 pins Mayfield head frame.

Step 1: Skin
A curvilinear incision is made behind the hairline with minimal shaving. Local infiltration with Bupivacaíne and Epinephrine 0.25% before the incision will decrease excessive bleeding from scalp.

A curved frontotemporal skin incision 8 to 10 cm (3.5 inches) is made behind the hairline, starting 2-3 cm (0.8 inches) above the zygoma preventing damage to the frontal branch of the seventh cranial nerve, ending incisión on the midline.
Step 2: Skin, muscle and bone landmarks
Step 2a
The skin is opened in one layer fashion (skin-galea-pericranium-muscle. Retraction of the frontal flap with 3 to 4 spring hooks. We recommend the placing of Raney clips on the posterior lip of the incision.

Step 2b
Detachement of the temporal muscle with a periostal retractor from it´s superior insertion (superior temporal line) previous discharge incisión of the temporal fascia.

Step 3: Key-hole
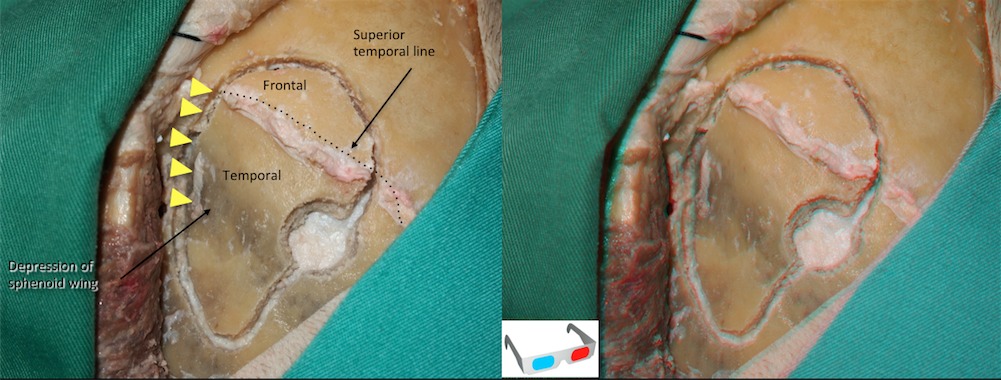
A single burr hole over the posterior limit of superior temporal line is made for the lateral supraorbital approach. in a classical pterional approach one burr hole is placed at the posterior insertion of the zygomatic arch (Key hole) as showed with a yellow circle in the figure.

Step 4: Craniotomy
Step 4a
The craniotomy is performed with a craniotome previous disection of the dura from the inner table of the skull. Sometimes the Sphenoid ridge is difficult to crossover with the craniotome, this problem is solved drilling a line over the sphenoid ridge with the blade (taking out the footplate) lifting the bone flap and fracturing the drilled line (yellow arrows).
Step 4b
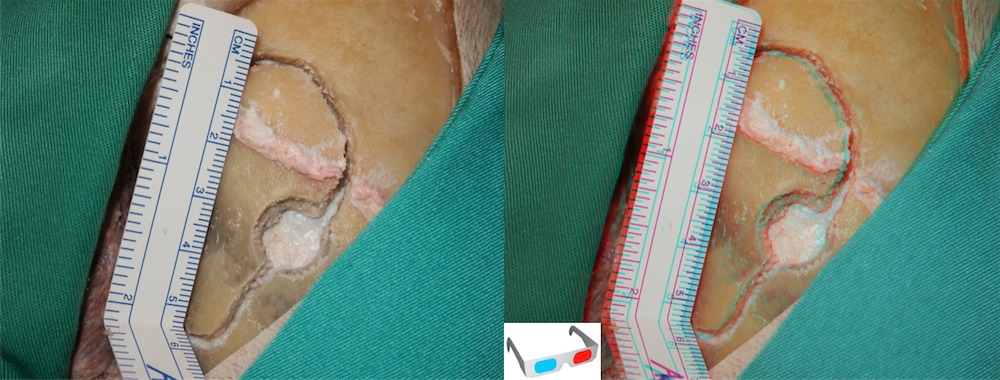
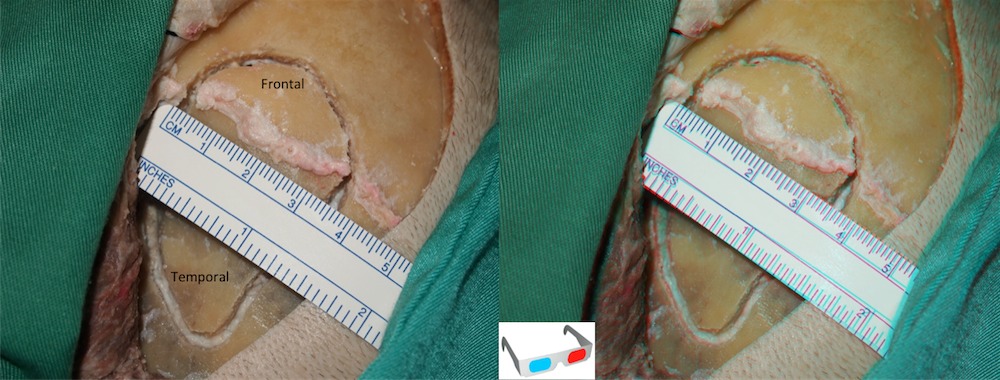
The bone flap measures 4-5 cm x 3 cm (1.6 x 1.2 inches). One third of the bone flap extends superior to the superior temporal line and two thirds of the bone flap extends inferiorly. The cranial opening is usually big enough to approach not only the main arteries of the Circle of Willis but also to approach the cavernous sinus and the suprasellar region.
Step 5: Removing sphenoid wing
Milling of sphenoid wing to gain access to the skull base allowing a better field of vision during the surgery. A Rongeur can be used to remove as much sphenoid wing as possible but it is usually easier and faster to drill it with a high-speed drill or a diamond drill as shown in the picture.

Step 6: Dural stage
Opening of the dura: Pedicled dural flap to the sphenoid wing is made with a curvilinear incision. Operating microscope can be use at this stage.

Step 7: Intradural stage

Retraction of the dural flap with multiple dural stiches. From this point on, the surgery should continue using the operating microscope.

Step 8: Microscopic dissection (2d)
Step 8a
The dissection starts in the frontobasal region, limiting with the proximal Sylvian fissure. The first aim of dissection is to reach the optic nerve in order to recognize the rest of vascular and nervous structures. The opening of the arachnoid membranes in the carotid-ophtalmic cistern allows the drainage of the CSF and therfore favors the relaxation of the brain avoiding the excessive use of brain retractors during the entire surgery.
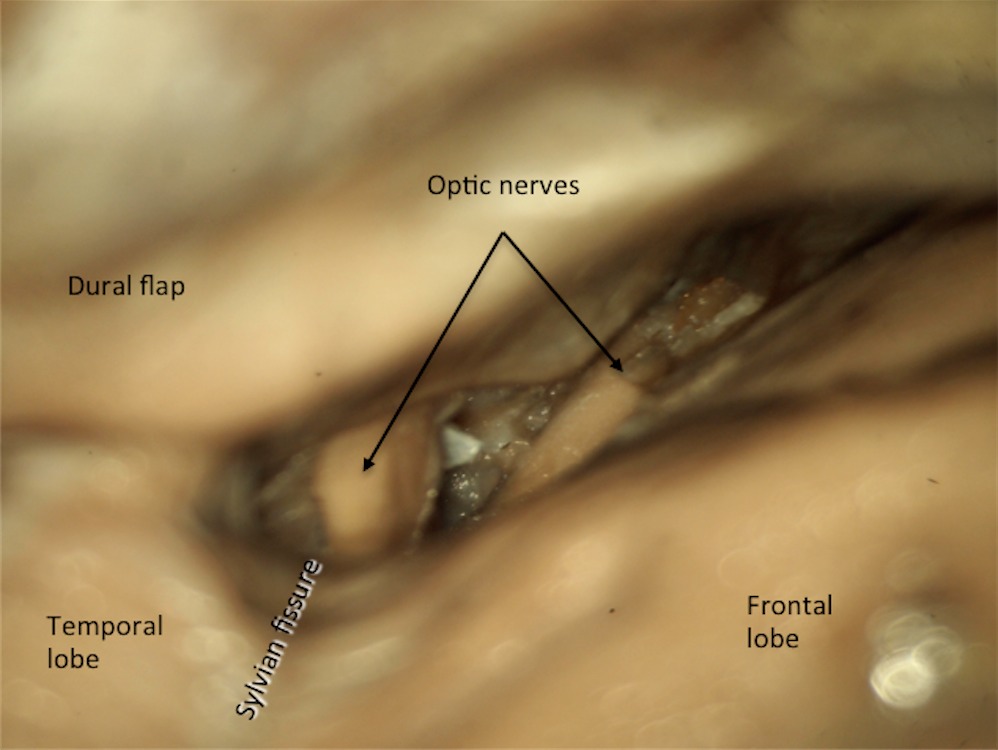
Step 8b
ON: Optic nerve

Step 8c
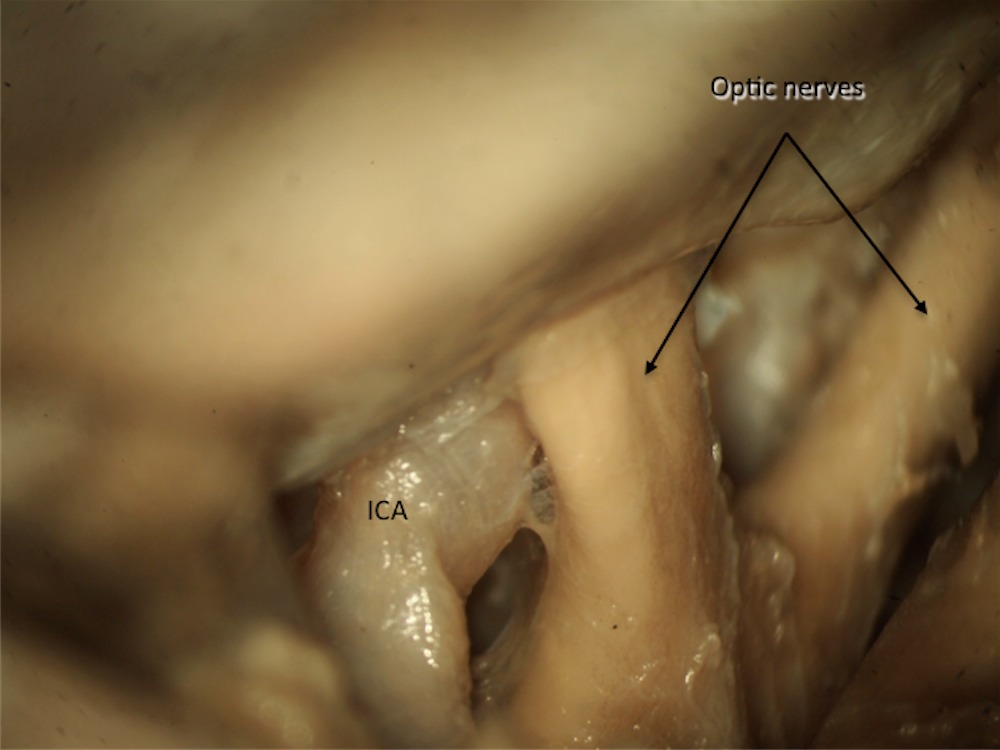
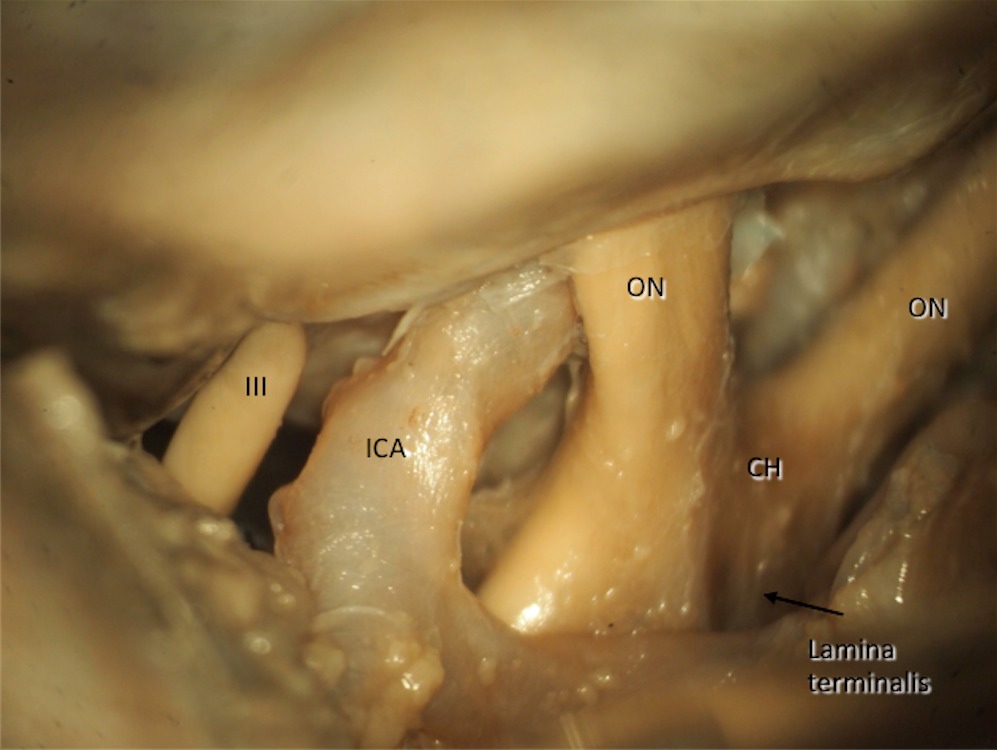
Step 8d
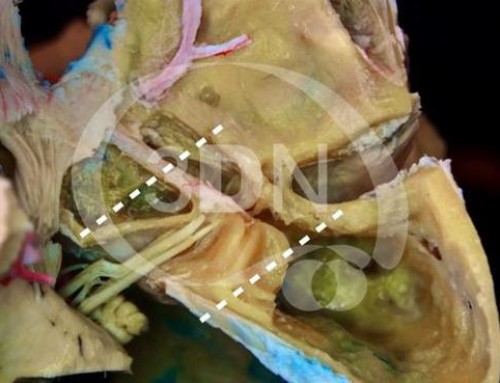
CH: Chiasma; ICA: Internal carotid artery; III: Third cranial nerve; ON: Optic nerve;
Step 8e
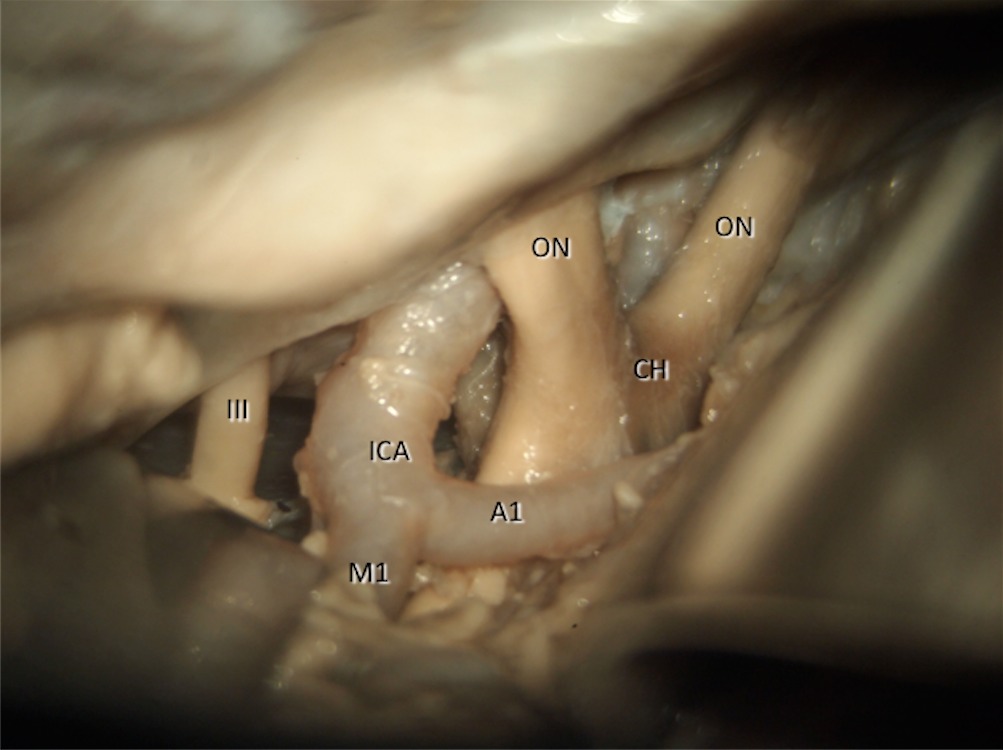
With this approach it is possible to recognize the origin of the posterior communicating artery (★) and anterior choroidal artery (★★) too which are shown in the picture being retracted with a dissector.

Step 8e
A1: Precommunicating segment of anterior cerebral artery; M1: Horizontal segment of medial cerebral artery.


Follow us